Posts

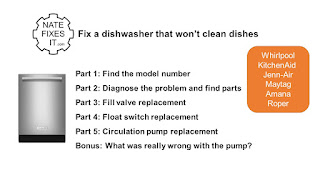
KitchenAid Advanced Clean Water Wash Dishwasher Filter Replacement and Pump Replacement

Image
Some KitchenAid dishwashers, like the mine in this video, use the Clean Water Wash System instead of a normal filter. You may think that the Clean Water Wash system doesn't have a filter, but it does. The advanced microfiltration is performed by permanently installed metal screen inside the pump. The dishwasher is supposed to automatically clean the filter and keep dirty food particles from recirculating in the wash. Unfortunately, these filters can become plugged or even develop a hole like mine did, which allows food particles to recirculate and leaves the dirty dishes at the end of the wash cycle. If you are wondering why are my dishes coming out dirty, check out this video. In this video I will show you how to replace the filter in a KitchenAid Clean Water Wash System dishwasher. You can do it yourself (DIY) and save money by not hiring a repairman. This video also shows you how to replace the KitchenAid dishwasher circulation pump completely. No more dirty dishes. Her...

Installing Large Format Tile Over Self Leveling Underlayment

Image
Part of our kitchen remodel project was installing a new floor.  We selected Heritage Cognac tiles from Porcelanosa .  These large format tiles measure 32 inches by 32 inches and weigh nearly 40 pounds each.  While this is not an easy tile to install, it can be DIY.  When installing large format tiles, which is any tile that measures more that 12 inches in one direction, there are some additional steps you need to take.  First is making sure that your sub floor is absolutely level.  My plywood subfloor was out of level by over an inch between the high and low spots.  I used Custom Building Products  LevelQuik RS to level the floor. What I love about LevelQuik RS is that you will be able to install tile directly on this surface in four hours as long as you pour at least 1/4 inch thick and use metal lath. This saves you the time and expense of installing Hardibacker or Schluter System Kerdi or Ditra. Here is a video shows you how to set leveling...

DIY Rustic Pipe Shelving and Amazon Basics 4-Shelf Cart

Image
I needed some shelving for my basement office/kitchen/brewing room/mancave (a little bit of a multi-purpose room I guess!)  I went with two different types of shelving.  On one wall I made a rustic shelf using 1/2-inch black pipe and planks.  This type of shelf is fully customizable can be built to meet your needs and available wall space.  Other names for this type of shelves are farmhouse shelving, industrial shelving, and black iron pipe shelving.  To get started measure the wall space and the items that you would like to store.  Next, create a sketch of the shelf and create a parts list.  You will likely need the following fittings: floor flanges, elbows, tees, floor flanges, and caps.  If you put the pipe through the shelf like I did, you should also buy washers to support the boards. You will also need lengths of pipe.  Pipe is available on Amazon or at your local hardware store in a variety o...

How to replace a spark plug and set the spark plug gap

Image
I was using my Honda Harmony 215 lawnmower for the first time this spring and it ran fine for the first half of the yard.  Then its started running rough, so I assumed it was a carburetor issue.  I cleaned the carburetor and decided to also clean the spark plug.  When I went to remove the spark plug I found that it was broken into two pieces!  I don't know how it ran at all!  Here's a video that shows how I replaced the spark plug: Make sure that you always adjust the spark plug gap before installing the new spark plug.  This video will show you how to do it by checking the gap from the old spark plug.  You can also check your owners manual to see the proper spark plug gap. Here are the two tools you will need to complete a spark plug replacement and to set the gap:

Kitchen Faucet, Garbage Disposal, and Disposal Air Switch Installation

Image
I am building a kitchen in my basement.  My counter tops were recently installed, but I still needed to install the faucet, garbage disposal, and garbage disposal air switch.  This blog post will show you how I did it. First I installed the garbage disposal air switch.  Given the location behind the sink, this is easiest to accomplish before installing the drain and garbage disposal.  I never knew these switches existed until my electrician told me about them.  They install in the same size countertop hole as a faucet sprayer or a soap dispenser.  The best part is their is no electricity in the switch, so no risk of shock on a wet countertop. The switch uses pressurized air to activate a separate electrical box under your sink.  This is the BESTILL sink top garbage disposal switch kit that I installed and an outlet tester like the one that  I used: It's available in multiple finishes and works great!  Here is a video that shows ...

Honda Key Fob Battery Replacement

Image
If  your Honda keyless remote battery is low, you will get a message on the dash that looks like this: Luckily it is easy to change the key fob battery yourself in just a few minutes. However, there is one trick you need to know to keep the circuit card and all of the buttons from falling out and giving you a real puzzle to put it all back together again. I will show you the trick in this video: Here is a link to where you can buy the exact same 2032 batteries that I used in this video on Amazon: I made this video with the key fob for my 2019 Honda Ridgeline, but the process is the same for any Civic, Pilot, Odyssey, Accord, Passport, CR-V or other vehicle made by Honda with a push-button start (keyless entry) in recent years.

How to touchup and refresh wood stain

Image
If your  trim, moldings, cabinets, doors, furniture, hardwood floors, or other stained wood is showing signs of wear and scratches, it's easy to refresh the finish and get it looking like new. Stain and a rag is the best method to touch up wood stain. In fact, it works better than the stain markers, touchup pens, or filler crayons and pencils are sold for touch ups. Here's how you can do it: This method works with Varathane and Minwax stains. I am using Dark Walnut in this video, but it works with any color of stain. If the flaws you are covering are small, you don't even need to match the color perfectly, just get as close as you can with available stain choices. For larger areas, you will want to try for the perfect match. A little can of stain goes a long way, so a half pint of stain should be enough for most jobs. Here are the items you will want to have for this project: #touchup #touch-up #stain #DIY

How to clean your coffeemaker without harsh chemicals

Image
 There are three reasons why you should clean your coffeemaker regularly: Mold, bacteria, and yeast can grow inside (Yuck!) Mineral buildup makes it less efficient which means it takes longer to brew your coffee Coffee residue makes your coffee more bitter Luckily, its easy to clean your coffeemaker using distilled white vinegar.  While there are harsh chemical products that you can purchase to clean your coffeemaker, I recommend using vinegar instead.  Do you really want to put those cleaning products into your coffeemaker and then drink coffee out of it? Here is a short video that shows you how I clean our coffee maker: You should clean your coffeemaker every couple of months.  If you are curious, this is the Mr. Coffee coffeemaker we use.   It works great, we especially like the removable reservoir which makes adding water easier and the vacuum insulated carafe which won't break like glass and keeps the coffee hot for two hours without scorch...

Toilet Fill Valve Replacement

Image
Are you wondering: Why is my toilet making noise? Why does my toilet keep running? Why is my toilet whistling? It's probably a bad fill valve. In this video, I'll show you how to replace a toilet fill valve. This easy fix can be accomplished by a plumbing beginner without any tools.  The only thing you will need is a bucket to catch water out of the toilet tank (don't worry, this is clean water, not raw sewage).  Here is the video: This is a link to the exact Fluidmaster 400H fill valve that I use which will work on almost all brands of toilets: Thanks for checking out my video!

Snowblower Track Drive Sprocket Replacement

Image
The drive sprocket on my MTD 10/26 track-drive snowblower broke while I was using it.  Replacing the track drive sprocket is actually quite easy.  The trick is to also loosen the idler sprocket, install the track, and then slide both sprockets back on at the same time.  I’ll show you how to replace the drive sprocket in this video: Here is a link to the exact drive sprocket I used for this repair, available for purchase on Amazon: As MTD also makes MTD makes Craftsman, Cub Cadet, and Troy-Bilt snowblowers, the same  process will work for those snowblowers. It will likely even be the same part if your snow thrower is around the same age (built in the mid-1990s).  MTD 10-26 Snowblower model number 316E760F118. By the way, if you have a steep driveway, a tracked snowblower is a must.  I have tried both wheeled and tracked snowblowers on my steep driveway slope, and there is no comparison on the amount of traction from a set of crawlers.  Even with ...

Snowblower Shear Bolt Replacement (Bonus: A different kind of snowblower!)

Image
The auger on this snowblower stopped spinning.  While this problem could be due to a bad gear box, it's most likely just a broken shear bolt.  Believe it or not, a broken shear bolt on a snowblower auger is actually a good thing!  These bolts are designed to break when you hit something hard, that way you don't break something much more expensive and difficult to replace like the gear box.  They are intentionally designed to be the weakest point.  Here is a video showing you how to diagnose a broken shearbolt and then quickly replace them with a hammer, a punch (a screwdriver will do in a pinch), and the appropriate size of wrench. If you use a snowblower, eventually you will break an auger shear bolt (also called shear pins).  Its not a matter of if, but when.  Make sure you have spares on hand.  Don't be tempted to use a normal bolt, it is to strong and you may break something more expensive next time!  Here are the shearpins and the punch ...

Screw Shoes - Make your shoes grip in the ice and snow

Image
I prefer to run outside instead of a treadmill, regardless of the weather.  I live in Pennsylvania which means I deal with ice and packed snow during the winters.  When the roads and trails are icy or packed snow, I put on a pair of screw shoes.  They are great for both road running and trail running.  Sure, there are lots of expensive winter traction aids available for purchase, but you don't need to buy YakTrax, MicroSpikes, or other expensive options when you can buy enough screws to outfit a couple pairs of shoes for much less.  This trick also works for hiking boots, snow boots, or any other shoe that you want to grip better in the ice and snow.  Those boots you use for clearing the driveway? Yep, those too. If you are a runner, grab one of your old pairs of road shoes that you surely have sitting around, and try this hack for yourself.  You can turn a pair of smooth soled road shoes into trail beasts! Not a runner, grab the shoes or boots that yo...

Pure Enrichment Air Purifier Filter Replacement and Quieting a Noisy Fan

Image
We've owned a Pure Enrichment Air Filter for 4 years and it works great.  When we bought it, it was nearly silent, but lately the fan has gotten louder.  This noise was caused by fan motor bearings that needed to be lubricated.  In this video, I'll show you how to access and lubricate the fan motor bearings: I used this oil from 3-in-one to lubricate the bearings to make them quiet again:  You also need to change the filters from time to time.  There are actually both a pre-filter and a HEPA filter.  The prefilter should be changed monthly and the HEPA filter should be changed every three to six months.  The filter package I purchase comes with two HEPA filters and eight prefilters, enough to last nearly a year of continuous use. If you'ld like to know how to replace the air filter, check out this video: Here are the airfilters that I use in my air purifier:  If you'ld like to check out the Pure Enrichment Air Purifier itself, here's a...

Did you know that your dishwasher has a filter and you need to clean it?

Image
Is your dishwasher failing to clean your dishes? When was the last time you cleaned the filter? Can’t remember or didn’t know there was a filter? You are not alone, many people don’t know that they should clean the filter periodically to keep their dishwasher running well, but it's easy and doesn't require any tools, this video will show you how . After cleaning, inspect the filter for damage and replace if needed, otherwise you may end up with a much more expensive problem like a failed circulation pump. If you need a new filter, these are too common replacements: Whirlpool, Kitchenaid, Maytag, Jenn-Air, Amana, and Roper dishwashers: GE, Hotpoint, Cafe, Profile, Monogram, and Haier dishwashers: Be sure to check your model number to verify that you are getting the right part ( instructions in this video ). My dishwasher is a Kitchenaid KDTE104ESS1. https://youtu.be/ylGDzryIG-Y

Kitchenaid Dishwasher Repair

Image
You don't realize how great a dishwasher is until it stops working.  Ours stopped cleaning the dishes recently, the same day I got a flat tire, what a day! See my YouTube video on how I fixed the flat tire.   Here are videos that show how I determined why my Kitchenaid KDTE104ESS1  dishwasher wouldn't fill with water and order the replacement parts.  All of these diagnostic procedures should work on Whirlpool, Kitchenaid, Amana, Roper, Jenn-Air, Maytag (they are all manufactured by Whirlpool): I went ahead and ordered both the fill valve and the float switch as they weren't expensive and I wanted to be ready to replace both if one or the other didn't fix it.  I used these replacement parts: Repalcing the fill valve is quite easy and can be accomplished with minimal tools without removing the dishwasher.  Here is a video of how to replace the fill valve: The float switch is even easier to replace than the fill valve, all you need is a screwdr...

How to clean a dirty spark plug

Image
Cleaning a dirty, or fouled, spark plug is an easy way to help a motor run better. It’s quick and easy and can be done with a variety of tools depending on what you have available. - Wire wheel on a drill - Wire wheel on a bench grinder - Wire brush This procedure will work with your lawnmower, garden tractor, snowblower, string trimmer, chainsaw, or any other small engine. Copyright 2020, NateFixesIt, LLC All information presented in this video is my opinion. Use at your own risk. For my full disclaimer see https://www.websitepolicies.com/policies/view/GF1tPsvw

Garage Door Cleaning and Lubrication

Image
Did you know that you should lubricate your garage door every 3-6 months?  I didn't, then my garage door started acting up, opening part way and then stopping abruptly.  I was able to fix it by simply cleaning the track and lubricating the moving parts.  Hopefully this video will help you do the same. Here are the supplies you need (Amazon links): Garage door lubricant Brake parts cleaner Brass wire brush Rags https://youtu.be/C66Txgfca50